By Chris Gilmore, Lead Brewer at Lone Tree Brewing Company
The rising demand for canned beers in today’s craft beer climate is driving an increase, not only in units purchased, but also in canning line technology itself. Many breweries have had to quickly shift their business model to packaging beer with the current restrictions due to COVID-19. While some are bringing in mobile canning companies, others are having to move to their own packaging. Deciding which canning line is the right fit can be a daunting task. This article aims to answer questions regarding need based on your volume and capabilities. From 8 cans in a minute to 800, there is a canning line available for nearly every sized brewery!
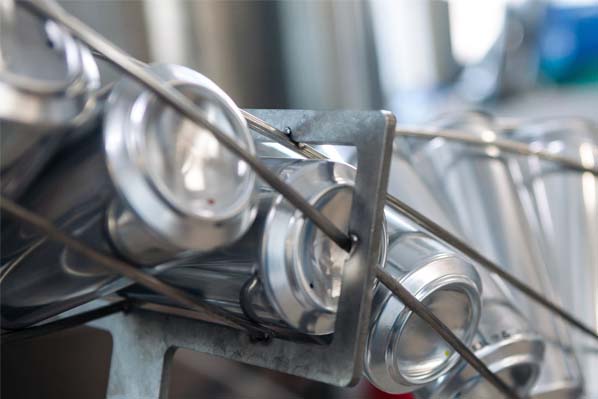
Anatomy of a Canning Line
At the simplest level, a canning line consists of four parts: a method of depalitization, filling and CO2 purging station, a lid seamer, and a form of packaging material application. The cans are depalletized automatically or manually. Your level of automation needs depends entirely on the speed of your canning line and labor efficiency and effectiveness. Some breweries will find they can manually rinse and load cans onto the filler conveyor with little concern for falling behind, while others demand a more high-tech approach. Initially, empty cans are loaded into a chute that inverts and rinses the cans prior to being purged with CO2 and filled with beer. Inverting the cans serves a two-fold purpose: 1) removing any foreign objects from inside of the can, and 2) rinsing with water to prepare the vessel for an unobstructed fill.
After being rinsed and inverted, the cans reach the CO2 purge and beer filling station. This is where a number of different filling methods are utilized to reach the desired weight and optimal oxygen pickup within individual cans. The most common forms of filling methods for cans are gravity or stem filling. Bottles are typically filled by way of counter pressure fill heads, but cans are normally not under pressure, making this filling method less useful for canned beer.
There are 3 major components to ensuring accurate fills every time: 1) temperature of the beer in the packaging vessel, 2) head pressure in the packaging vessel, and 3) the carbonation level of your beer. Every canning line functions at its highest efficiency level under different circumstances. For most canning lines, setting the temperature around 34°F will provide the necessary environment to produce enough of a dome without being too foamy. It is crucial to properly clean your fill heads and transfer hose to ensure a sanitary surface. Build up and debris in fill heads can result in beer with off flavors and turbulent fills. Similarly, it is standard to maintain a head pressure of 15-18 psi in your packaging vessel. Carbonation levels not only affect the finished products taste and mouthfeel, but they help ensure proper foaming during fill cycles and maintaining that ever important foam dome to help reduce dissolved oxygen pickup during filling. Your carbonation levels will be dictated by your beer style, canning line, and the tools you use to measure CO2 volume. The most effective CO2 levels range between 2.2-2.8 volumes on an Anton Paar C-Box. Once the cans have been filled, they continue down the line and receive a lid (“end” is the official term) and enter the seam house.
The seamer is undoubtedly the most important part of every canning line. Read that again. The seamer is the most important part of every single canning line. You can make the best beer in the world and fill every can to the perfect level with optimal oxygen pickup, but the minute you have a failing seam none of that matters. Maintaining a clean and frictionless seamer is hugely important in the seam process. I recommend scrubbing the seamer with a Star San and water solution before air drying the individual seamer components. Most seamer set-ups utilize the same format: a platform that raises the cans up to the seamer, the “chuck” or the piece that fits into the can lid helping to maintain stability, and your two seam operations or “die”. With double seamed cans the can is lifted up to the chuck at which point the first operation rolls the lid over the can before being fastened completely by the second operation.
The finer points of seaming could be an entire article of its own; however, there are a few crucial measurements to take during canning runs to ensure proper seams. Countersink depth, first operation thickness, second operation height, second operation thickness, cover hook, and body hook all being within specification will result in a perfectly seamed can. These measurements can be taken with a micrometer and caliper that are usually provided by your canning line manufacturer.
When the can leaves the seam house it is conveyed under water rinsers and some form of compressed air to dry it off before entering the final stage of the canning line. The applicator used to package the cans in their final form depends on if you use plastic rings, PakTech holders, or cardboard boxes. Cans will be separated into your desired quantity and fastened with the packaging material of your choice. Once through the applicator, unless automated, you will need someone to visually inspect the can quality and stack the finished cases on a pallet at which point your cans are ready for market! The canning line market offers tons of aftermarket parts to upgrade and increase output, so much so that most lines are built to be expanded as your needs increase.
Canning Line Varieties
There are various styles of canning lines available to breweries, the most common being direct-feed and tandem processing models. The most glaring difference between a direct-feed line and a tandem processor is the rate at which cans are filled and seamed. Direct-feed lines are typically able to run 8-40 cans per minute, whereas the tandem processing lines are capable of moving a couple hundred units in the same amount of time. Within the tandem processing line family exists a number of unique subsets catering to specific production volume needs. Looking at you, rotary fillers and monoblock designs!
General Clean In Place (CIP) Processes of Canning Lines
Cleaning your canning line before and after running it is always highly important. There are various CIP methods and applications; however, the gist is usually the same: some type of detergent, followed by a water rinse, and finished off with a sanitizer that will leave your canning line sparkling clean and ready for beer! For the first cycle, some brewers prefer to use PBW or PBW Liquid in place of a caustic cleaner. PBW Liquid is much less abrasive than caustic soda when it comes to softer metals and stainless steel. PBW Liquid is easily mixed into solution and recirculated through the transfer hose and canning line for roughly 25-30 minutes. After the PBW Liquid detergent cycle, you should then rinse the transfer hose and fill heads with straight water to rinse the detergent from the lines. The final step requires the use of a sanitizer, such as Star-Xene, to fully prepare the canning line for action. Star-Xene is a stabilized chlorine dioxide that works tremendously well for CIP purposes. It is a final rinse sanitizer that must be activated with citric acid. A 30-minute Star-Xene cycle to conclude the CIP process before hooking up the transfer hose to the packaging tank works best. Other sanitizers suggested for canning lines are Saniclean or IO-Star. Be sure to clean, clean, and clean again! Having a proper clean in place system will guarantee a consistent product every time.
Determining the Right Line for You
The most important factors in selecting the proper canning line are cost, your projected volume going into cans over the next 2-3 years, and available well-versed operators. Some breweries find success in buying a line that fits their immediate needs, while others buy large and plan on growing into it. Once your brewery breaks the 20,000 barrels per year mark you should consider a tandem processing machine that can handle the volume without having to be run 24/7/365. If you can manage to operate manually when possible, you will learn more about your line and get a true idea for the level of automation required. Evaluate and reevaluate before spending your precious cash on a machine you do not need. Let’s face it-your time and money is valuable---but getting that precious liquid into the hands of customers is irreplaceable!